dtIngest Tutorial
"dtIngest" is a DataTorrent application that ingest data from various sources and egress the processed data to various sinks. The data movement happens at scale and in parallel. To know more about dtIngest please refer the dtIngest blog.
This tutorial refers to dtIngest version 1.0.0
Pre-requisites
-
Datatorrent RTS on a Hadoop cluster. Please refer to Installation guide for details.
-
Source and destination file systems must be accessible from all DataTorrent RTS nodes. It can be any of HDFS, NFS, S3, FTP. For sandbox image or single node hadoop cluster you can also use local files as source. But, for multi-node cluster local files cannot be used as source.
-
If source or destination file system is NFS; then NFS should be mounted on all the nodes within the Hadoop cluster at a common mount point and should have read/write permission to the user running dtIngest application.
Launching dtIngest
dtIngest application can be configured and launched from Datatorrent Management Console.
-
Navigate to 'Develop' tab.

-
The dtIngest application package is already uploaded and available to use under 'Application Packages' section.
-
Select 'Ingestion Application' from the list of App packages. And click on ‘launch application’ button.

-
Configuration page for dtingest is displayed after the 'launch'. Enter the configuration values and click 'Launch' to ingest your data.
Configuring dtIngest Instance Properties
-
In the 'Name this application' textbox; name the application instance. For example, 'Ingestion test'

-
Leave 'Specify a queue' unchecked to use default queue.
If you want to specify a queue to launch this application, check 'Specify a queue' checkbox and select queue from the dropdown. For more information, go to Hadoop Capacity Scheduler Docs

-
Under 'Use config a file' option, check the box to use existing configuration file. Select file from drop down to load the configuration file.

Once it is loaded, you can modify the values. You can save the new configuration as a new file or overwrite the existing one.
Leave 'Use a config file' unchecked to create a new one.
-
Configure input source, refer to Configuring input source section for details.
-
Configure output destination, refer to Configuring output destination section for details.
-
Configure processing steps, refer to Configuring processing steps section for details.
-
Under 'Save Configuration file' give name for configuration; if you wish to save this combination of values for future use. You may keep this blank if you do not want to save this for future use.
Configuring Input Source
Configuring HDFS input
-
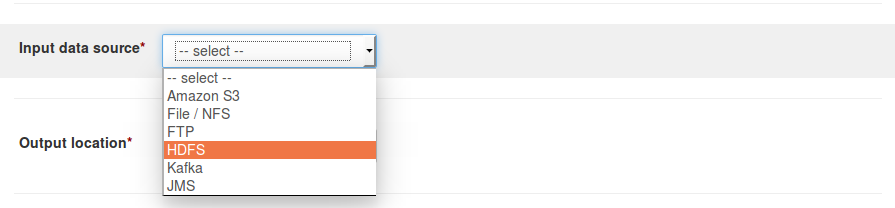
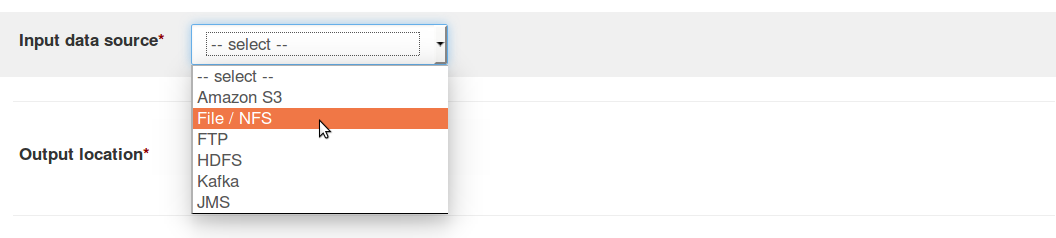
For 'Input data source' field; select 'HDFS' option from the drop-down.
-
Under 'Source directories'; specify complete URL for the file path to be ingested.
For example, if the namenode is 'namenode1.cluster.company.org' and port is '8020' and file path is ''/user/john/data' then complete URL in this case will behdfs://namenode1.cluster.company.org:8020/user/john/data.
Where,hdfs://indicates HDFS protocolnamenode1.cluster.company.orgindicates fully qualified domain name for the namenode of source HDFS.8020indicates port number for HDFS namenode service/user/john/dataindicates full path for destination directory
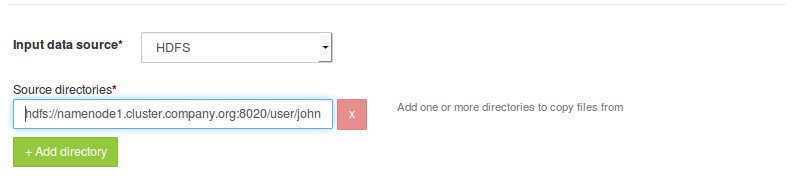
If there are more than one directories/file to be ingested, click on 'Add directory' button and specify complete URL file path to be ingested.
-
In the 'Filtering criteria' field, specify regular expression for files to be copied. For regular expression syntax, please refer to Java regular expression documentation. For example, if only
.logfiles need to be ingested, then use.*\.logas regular expression.
Where, -
.*indicates any character zero or more times -\.indicates dot escaped with backslash -logindicates desired extension which is 'log'In this case, dtingest ingests only '.log' files from the source directories.
-
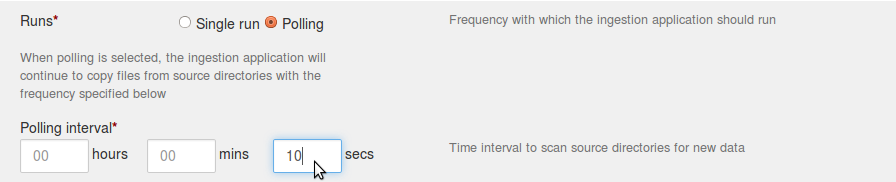
Under 'Runs' field, select 'Single run' if you want application to shutdown after completing files ingestion.
Select 'Polling' if you expect application to periodically poll the directory/file for changes. File change is based on timestamp difference. Entire file will be ingested again in case of any change.
If 'Polling' mode is selected, then 'Polling interval' should be specified. This is the time interval between subsequent scans for detecting new/modified files.
Configuring NFS input
-
For 'Input data source' field; select 'File/NFS' option from the drop-down.
-
Under 'Source directories'; specify complete URL file path.
For example, if the NFS mount is located at '/disk5/nfsmount' and 'path/to/data/directory' is the directory under this mount which needs to be ingested; then complete URL in this case will be
file:///disk5/nfsmount/path/to/data/directory. Where, -file://indicates that it is some file system mounted on the node. -/disk5/nfsmount/indicates the mount point. Note that, this has to be uniform across all the nodes in the cluster -path/to/data/directoryis the directory to be ingested
Note that, for the above example, there should be
///(triple slash) afterfile:. -
If there are more than one directories to be ingested, click on 'Add directory' button and specify complete URL file path.
-
If there are specific files, as opposed to a directory,specify complete URL file path.
For example, if some other NFS mount is located at '/disk6/nfsmount2' and 'path/to/file/to/copy/datafile.txt' is a file under this mount which needs to be ingested; then complete URL in this case will be
file:///disk6/nfsmount2/path/to/file/to/copy/datafile.txt.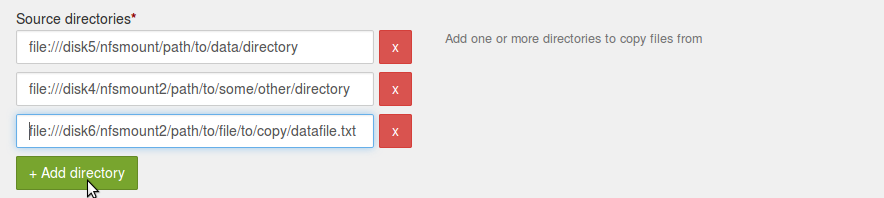
-
In the 'Filtering criteria' field, specify regular expression for files to be copied. For example, if only
.logfiles need to be ingested; then use.*\.logas regular expression.Where, -
.\*indicates any character zero or more times -\\.indicates dot escaped with backslash '\' -logindicates desired extension which is 'log'Therefore, dtingest ingests only
.logfiles from the source directories. -
Under 'Runs' field, select 'Single run' if you want application to shutdown after ingesting files currently present in the directory.
Select 'Polling' if you expect application to periodically poll the directory/file for changes. File change detection is based on timestamp. Entire file will be ingested again in case of any change.
If 'Polling' mode is selected; then 'Polling interval' should be specified. This is the time interval between sub-sequent scans for detecting new/modified files.
Configuring FTP input
This section gives details about how to ingest files/directories from FTP using dtIngest.
-
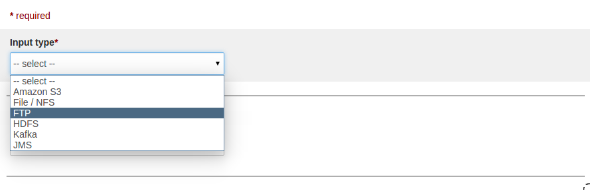
Select FTP as input type
-
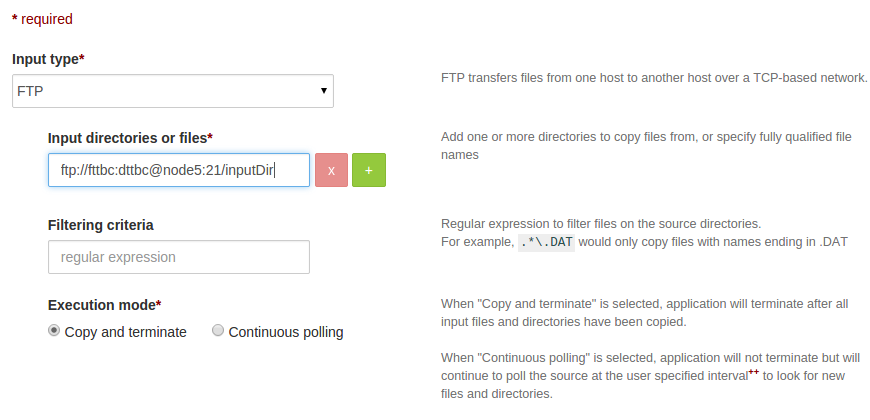
After selecting the FTP as input type, snapshot of UI as below:

-
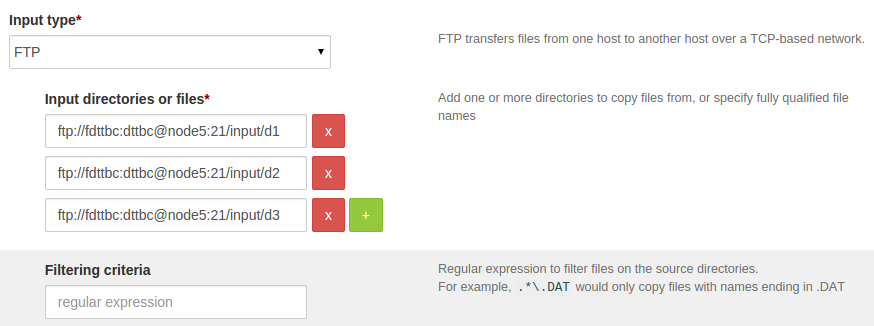
The format for FTP URL input is as follows:
ftp://username:password@host:port/pathwhere,ftp: protocol nameusername: username for ftp serverpassword: passwordhost: FTP hostport: port numberpath: path to either file / directory
To copy multiple files/directories, see below:

To copy multiple directories, see below:
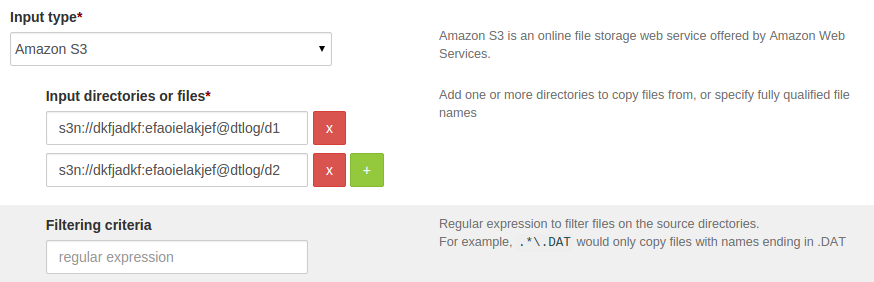
Configuring Amazon S3 input
For details on Amazon Simple Storage Service (S3), please go to Amazon S3 Documentation. This section gives details about how to ingest files/directories from S3 using dtIngest.
-
Select S3 as input type
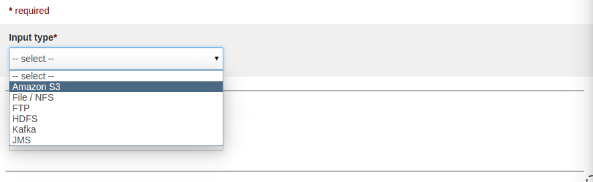
-
After selecting the S3 as source type then UI looks like as below:
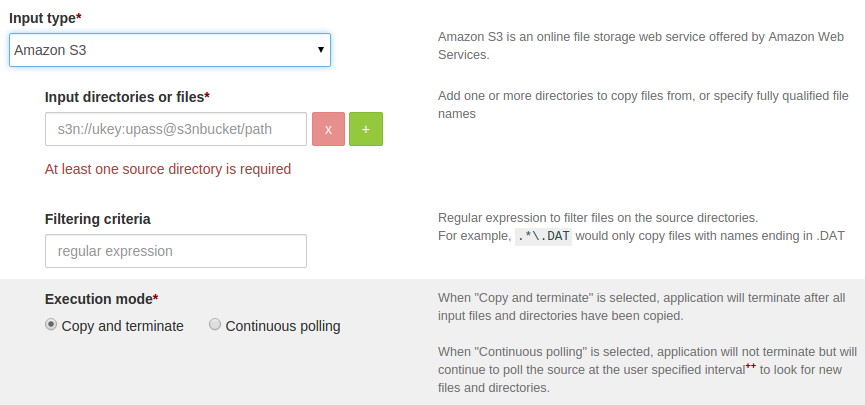
-
Configure S3 input url.
Input url for S3 needs to be provided in following format,
s3n://ukey:upass@bucketName/pathwhere, -
s3n: protocol name -ukey: access key -upass: secret access key -bucketName: bucketName -path: path to either file / directory
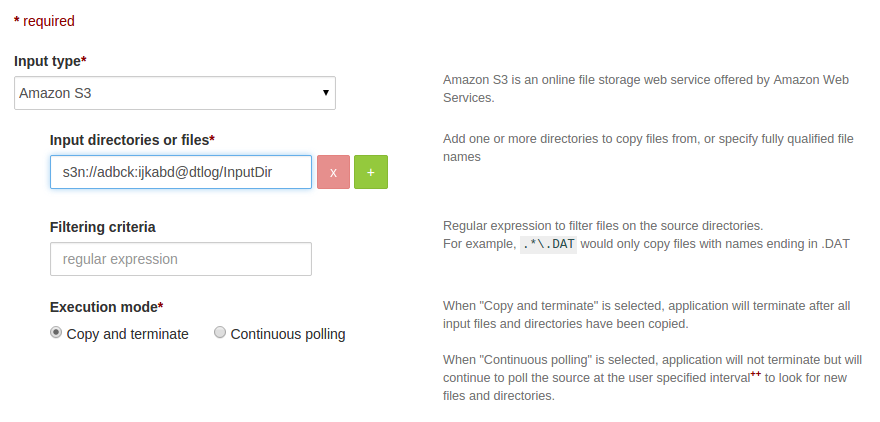 If you want to copy multiple directories, then click on (+) button and
specify the url’s, UI would be as below:
If you want to copy multiple directories, then click on (+) button and
specify the url’s, UI would be as below:
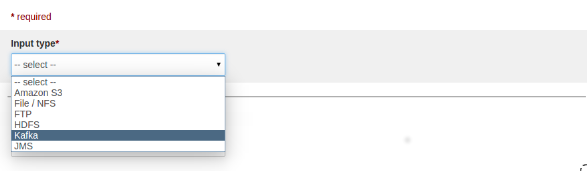
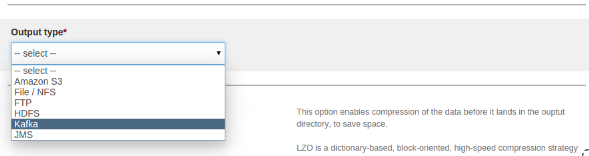
Configuring Kafka input
For more details on Kafka, please refer to Apache Kafka Documentation.
This section gives details about how to ingest messages from Kafka using dtIngest.
-
Select Kafka as input type
-
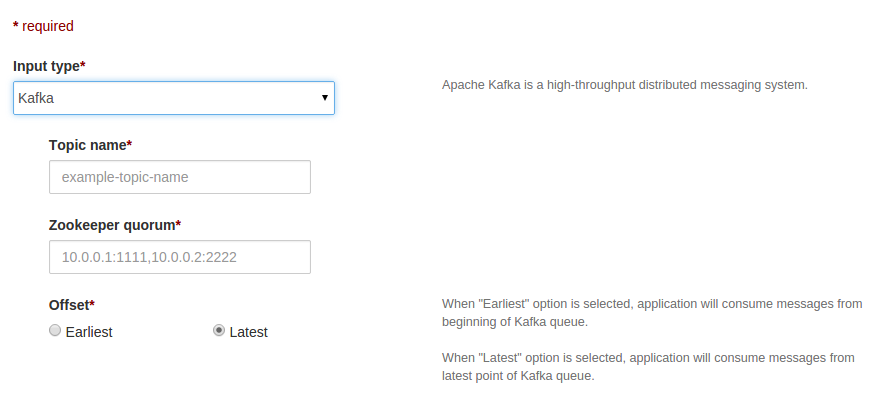
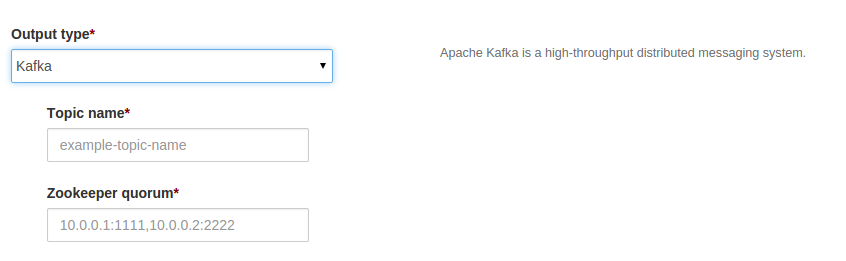
After selecting Kafka as input type then UI looks like as below:
-
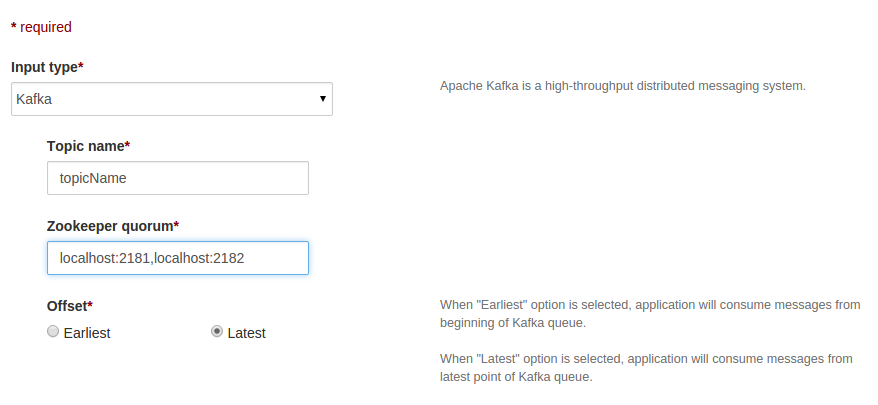
Configure topic name and Zookeeper quorum. Zookeeper quorum is a string in the form of
hostname1:port1,hostname2:port2,hostname3:port3where,
hostname1,hostname2,hostname3are hostsport1,port2,port3are ports of zookeeper server
e.g. localhost:2181,localhost:2182
-
Select the offset type (default is “Latest”). If you want to consume messages from beginning of Kafka queue, then select “Earliest” offset option.
-
If the topic name is same across the Kafka clusters and want to ingest data from these clusters, then configure the Zookeeper quorum as follows:
c1::hs1:p1,hs2:p2,hs3:p3;c2::hs4:p4,hs5:p5,c3::hs6:p6where, -
c1,c2,c3indicates the cluster names, -hs1,hs2,hs3,hs4,hs5,hs6are zookeeper host names -p1,p2,p3,p4,p5,p6are corresponding ports.For example, ClusterA and ClusterB are 2 Kafka clusters as below, then Zookeeper quorum would be as
ClusterA::node3.example.com:2181,node4.example.com:2181;ClusterB::node8.example.com:2181
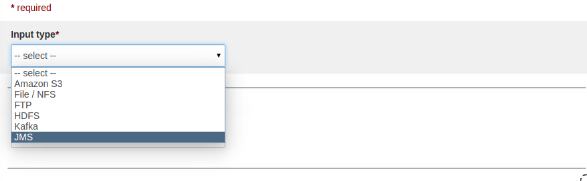
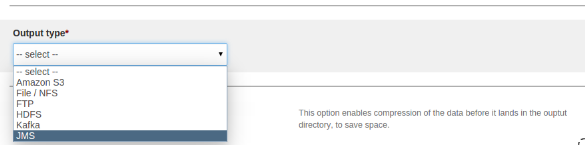
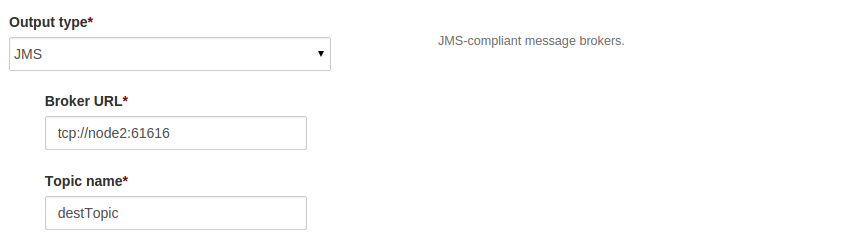
Configuring JMS input
This section gives details about how to ingest messages from JMS using dtIngest.
-
Select JMS as input type.
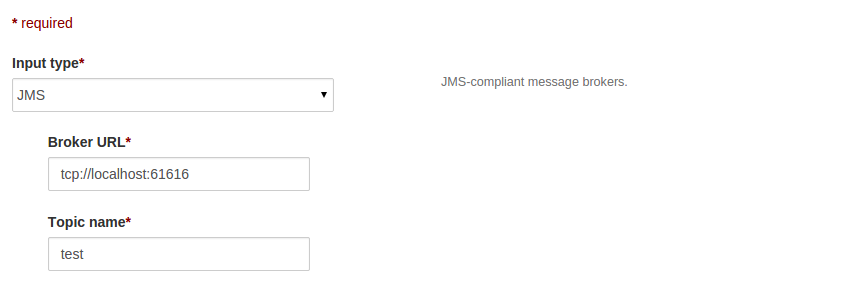
-
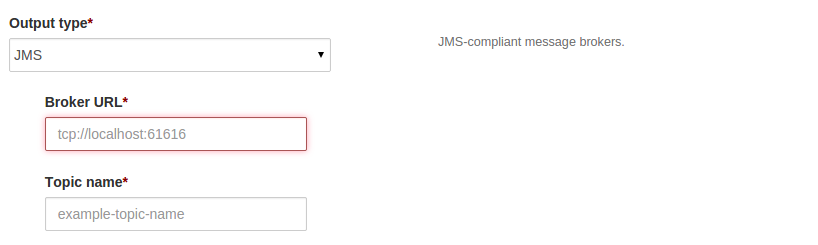
After selecting the JMS as source type then UI looks like as below:
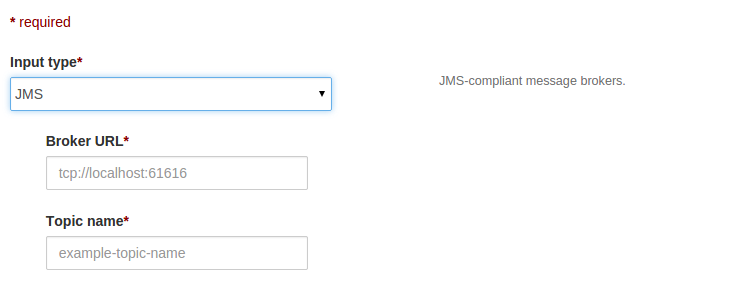
-
Configure Broker URL and topic name as tcp://hostName:port
Configuring Output Destination
Configuring HDFS output
-
For 'Output Location' field, select 'HDFS' option from the drop-down.

-
Under 'Target directory' specify complete HDFS path URL of the destination directory. For example,
hdfs://namenode1.cluster.company.org:8020/user/username/path/to/destination/directory
Where,
- hdfs:// indicates HDFS protocol
- namenode1.cluster.company.org indicates fully qualified domain name for
the namenode of destination HDFS.
- :8020 indicates port number for HDFS namenode service
- /user/username/path/to/destination/directory indicates full path
for destination directory.
-
Under 'Recursive copy' option, select 'Yes' if you wish to copy entire directory structure under source directory to the destination. Select 'No' if you want non-recursive copy.
-
Under 'Overwrite conflicting files' option, select 'Yes' if you wish to overwrite the file at the destination if file with the same name is discovered under input source.
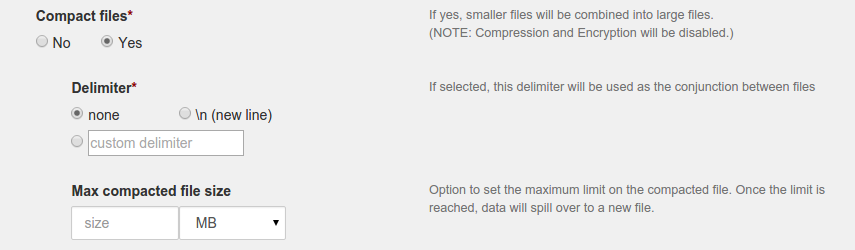
Compact files
Use 'Compact files' feature if you want to partition data into fix size. This can be used to combine large number of small files into partitions of manageable size. Vice versa, you can break down a very large file into partitions of manageable size.
-
Select 'yes' for radio button under 'Compact files' option. This will display additional options for compaction. If you do not want to compact files but copy them as they are; then select 'no' for 'Compact files' option. If you select 'no' ; additional options for compaction will be hidden.
-
Select delimiter to be used for separating contents of the files. This will be useful if you decide to use some custom logic for parsing partition files. Default value for 'delimiter' option is 'none'. You can use new line or any other custom delimiter based on your requirement. Note that, special characters in the custom delimiter should be escaped with
\. For example, tab character\tshould be specified as\\t. -
Specify the size for each partition under 'Max compacted file size'. You can specify partition size in bytes, MB, GB. Data will spill over to the next partition once this size is reached.
Note that, partition will be of exact sizes in case of continuous incoming data. If there is no incoming data for consecutive 600 windows then that partition will be committed to the HDFS. In this case, new incoming data will be spilled to the next partition.
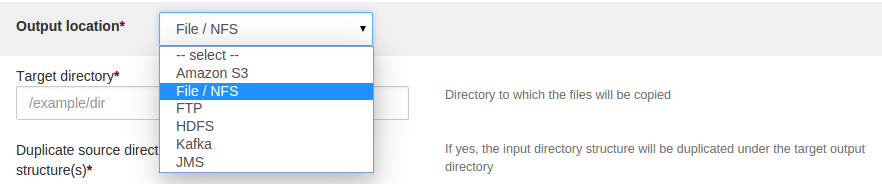
Configuring NFS output
-
For ‘Output Location’ field; select ‘File/NFS’ option from the drop-down
-
Under ‘Target directory’ specify complete NFS path URL of the destination directory.
For example, if the NFS mount is located at '/disk5/nfsmount' and 'path/to/data/directory' is the directory under this mount which needs to be ingested; then complete URL in this case will befile:///disk5/nfsmount/path/to/data/directoryWhere,
file://indicates that it is some file system mounted on the node./disk5/nfsmount/indicates the mount point. Note that, this has to be uniform across all the nodes in cluster.path/to/data/directoryis the directory to be ingested

Note that, for the above example, there should be
///(triple slash) afterfile:.
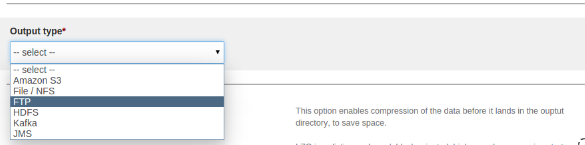
Configuring FTP output
-
Select FTP as output type.
-
After selecting FTP as output type then UI looks like as below:

-
Specify the destination URL below the “Output directory” label. The FTP Output URL is as follows:
ftp://username:password@host:port/pathWhere, -
ftp: protocol name -username: username for ftp server -password: password -host: FTP host -port: port number -path: Directory path to ingested
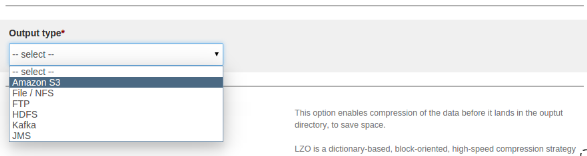
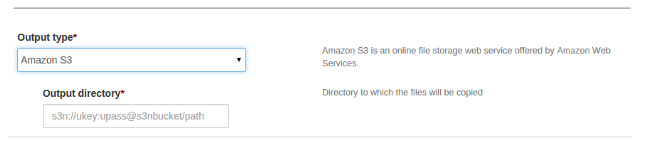
Configuring Amazon S3 output
-
Select S3 as output type.
-
After selecting S3 as output then UI looks like as below:
-
Specify URL destination below the 'Output directory' label. The S3 output URL is as follows:
s3n://ukey:upass@bucketName/pathWhere,s3n: protocol nameukey: access keyupass: secret access keybucketName: bucketNamepath: Directory path
Configuring Kafka output
-
Select Kafka as output type.
-
After selecting Kafka as output then UI looks like as below:
-
Configure broker list and topic name.
Configuring JMS output
-
Select JMS as output type.
-
After selecting JMS as output type then UI looks like as below:
-
Configure Broker URL and topic name as tcp://host:port
Configuring Processing Steps
Configuring compression
Select compression type on configuration page

- Select LZO radio button to apply LZO compression

Lzo compression is not directly supported. To use lzo compression provide plugin to ingestion app which provides lzo implementation and extends from java FilterOutputStream class. Copy plugin to \~/.dt/plugins folder (i.e. HOME_DIR/.dt/plugins) of the user who launches ingestion app. We do ship default lzo plugin, and is available to download on maven repository at https://oss.sonatype.org/content/repositories/releases/com/datatorrent/dtIngest-lzo/1.0.0/
- Select GZIP radio button to apply GZIP compression

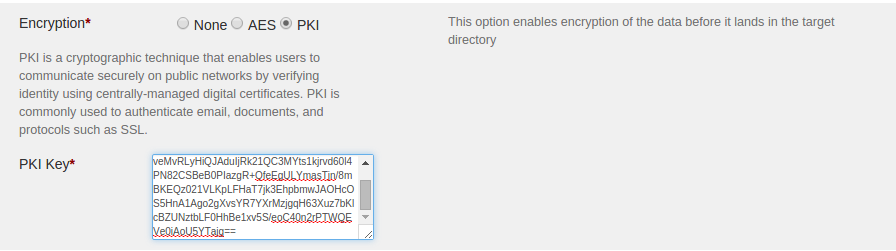
Configuring encryption
Select encryption type on configuration page.

- Apply AES encryption:
-
Select AES radio button to apply AES encryption
-
Provide AES symmetric encryption key in “AES key” text box
Note: AES symmetric key should be of size 128, 192 or 256 bits.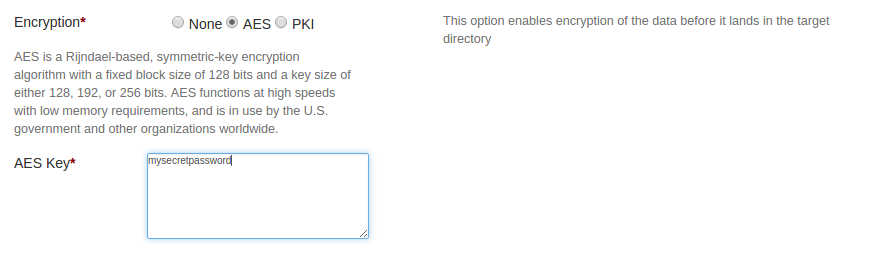
-
Apply PKI encryption:
- Select PKI encryption button to apply PKI encryption
- Provide Asymmetric public key to be used for PKI encryption